Uncategorized Archive

Creating a new VirtualBox VM on the command line

Posted March 1, 2014 By Landis V

I finally removed a computer that I’ve had running for quite a while, configuring another “intermittently operational” system to run all the time.  I’d like to have the old system run as a VirtualBox VM on the new system.  My VirtualBox VMs are running headless as services using VboxVMService.  Further, one of my VirtualBox VMs runs an Ubuntu guest which itself runs Linux Containers guests for some small, lightweight hosts on my network.

I’ve got a couple of existing LXC guests that do some monitoring for me using Nagios, run a Gitlab instance, and a couple of others that I no longer need and will probably remove.  I’d also like to set up a couple of new hosts to run a small, simple webserver for my home network “homepage” with links to things I commonly use and a Puppet system to manage my configurations a little bit more efficiently (especially credentials if I look to expand the number of Linux hosts on my network; I’d like the logins to be maintained automatically, and very preferably to be key based).

My straight Nagios monitoring takes a bit more thought to maintain than I’d like, given the number of things on my mind at any given time, so that’s one of the first things I’d like to simplify.  However, from the point of view of simplicity, creating a dead simple web host (though I’d like to eventually integrate some DNS service discovery…) is the simplest.

I spun up a new, basic LXC with Apache, RCS, and a few Perl modules to load Foswiki onto for a basic intranet home page.

Finally attempting to spin a new VM from the command line… fails

VBoxVMService does not allow you to run the VirtualBox GUI at the same time, as I understand it.  As such, I assume that I will need to create any new native (non-LXC) guests I require from the command line.  This Oracle reference describes how to configure the VM instances from the CLI using the ‘vboxmanage’ command.  However, upon issuing a ‘vboxmanage list ostypes’ command, I discovered that even the CLI version appears to be dependent upon the same COM configuration that prevents the GUI from running.  So, I configured as stated at http://sourceforge.net/p/vboxvmservice/wiki/Runing%20VirtualBox%20GUI%20together%20with%20VBoxVmService/.  This didn’t take immediately, so I restarted.

Numerous hassles

I had a lot of problems being able to get back into VirtualBox to work on setting up a VM to replace the machine I took down, generally appearing to be related to permissions.  I’d run across a batch file that someone had written that supposedly sets the permissions appropriately to allow you to switch back and forth between the VirtualBox GUI and VBoxVMService, but it didn’t seem to be very effective.  I was finally successful after uninstalling VirtualBox, deleting the VirtualBox directory, reinstalling, then going into DCOMConfig and setting permissions back to defaults (everything on Security tab as “Use Defaults” and the Identity tab as “Launching User”).  That let me get back in and do some things.

Using a physical/raw disk in a VM

I referenced these instructions to configure the disk I had pulled from my old system as a raw disk for the VM.  A couple of notes on items that proved handy:

  • The command wmic diskdrive list brief under Windows 7 helps to identify the correct PhysicalDrive setting to use in creating the VMDK.
  • User Account Control under Windows 7 is a turd for configuring the physical disk as a VMDK.  I was able to get around this by going into User Accounts -> Change User Account Control Settings and slid the bar all the way to the bottom – i.e., don’t prompt me for anything (I didn’t reboot as the system told me I had to).  I was then able to create the VMDK under my local account, which has administrative privileges (previously I had received the error “VBoxManage.exe: error: Cannot open the raw disk ‘\\.\PhysicalDrive1’: VERR_ACCESS_DENIED
    VBoxManage.exe: error: The raw disk vmdk file was not created” under my own account and “VBoxManage.exe: error: Failed to create the VirtualBox object!
    VBoxManage.exe: error: Code CO_E_SERVER_EXEC_FAILURE (0x80080005) – Server execution failed (extended info not available)
    VBoxManage.exe: error: Most likely, the VirtualBox COM server is not running orfailed to start” under a “runas administrator” command window.

This was a great idea until I determined that I couldn’t (or at least there wasn’t a method I could find) grant my user account raw/physical disk access under Windows 7 Home.  I can run VirtualBox as an administrator and launch the machine, booting from the physical drive, and everything works.  Unfortunately I’d prefer not to run as an administrator, so I will probably need to work on converting the physical disk to an image.  My goal is ultimately to get everything copied off of that drive anyway and eliminate the machine; I had just thought this might be a shortcut to save a step or two.
Be the first to comment

DIY Stir Plate Build

Posted January 25, 2014 By Landis V

I recently posted a link to a DIY stir plate build and needed to get started on my own list to keep track of supplies I have, supplies I need, and where I’m at in that task.  (Note:  As of 2/5, I completed this mostly with equipment I had on hand.)

Part List

List of parts and prices for the build.

  • 120mm Computer case fan
    • Had on hand, typically available for <$5 if you look (techbargains.com, slickdeals.net)
  • Erlenmeyer 2000ml flask
    • (Purchased) Amazon $14.25 (10-Jan-14)
  • Epoxy
    • JB Weld, had on hand, Menards $4.67/Amazon $6.64/Wal Mart $4.67
      • I was surprised to discover that this stuff apparently does actually contain steel.  While affixing the washer to my fan, I observed a small finger of the blended epoxy creeping out from under the washer and towards my magnet.  I’d suggest marking the position of your magnet(s) and centering based on your marks, and not attempting to assemble with the magnets in place.  Otherwise, you may find them epoxied in place!
  • Misc hardware (nuts/bolts/washers for table attachment/standoff)
    • Had on hand.  Used rubber anti-vibration pads that came with the case fan I replaced with the one I had on hand.  I just set the table on top of the fan on the side with the rubber pads protruding and approximately center it.
  • Neodymium/rare earth magnets
  • Stir bars
  • Table to support Erlenmeyer flask above fan
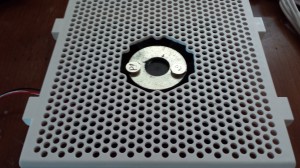
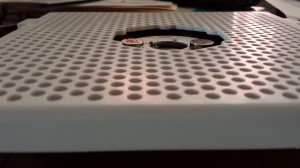
    • Had on hand/made from a ~10″ square piece of plastic, probably about 1/8″ thick, that came from one of those old lights that uses the heat from the bulb to turn an impeller (propeller? should look this up I guess) to cast a rotating image on walls/ceiling through a cellophane medium.
  • Washer (large)
    • Had on hand; if you don’t, less than a buck at the local hardware.
  • 12V Power supply
    • I had one of these on hand that already had a power switch, and had the quick wiring disconnects so I could just tie it right onto the red and black leads from my fan.
  • Potentiometer
    • I picked up a potentiometer from Radio Shack to allow me to control the speed, but I’m not sure I’m going to need it.

Build Process

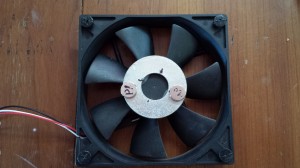
The build process is more or less as described in the original article I linked to.  I simply centered the large washer on the hub for my case fan and glued it in place with J-B Weld epoxy.  As I noted, J-B Weld does appear to actually contain some steel, so I recommend mounting the washer without having the magnets stuck to it.  Once the epoxy hardens, gently place the magnets on the washer approximately across from each other, spin the fan, and try to balance it as well as possible.  I found that you can place the stir bar across the magnets directly and it helps to visualize how well it will be centered above the fan hub, and ultimately how efficiently and quietly the stir plate will operate.

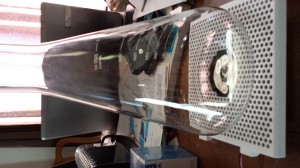
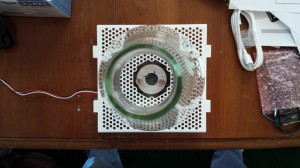
Below are a few build/post build pictures.

20140125_150610 20140125_150618 20140125_150701 20140125_150725 20140125_150910 20140125_150943

Video of initial test

Be the first to comment

Brewing purchase, price, and priority list

Posted November 29, 2013 By Landis V

I’m not far into my brewing journey, but I am already hooked on the process. It’s a terrible hobby for me to get involved in, given the endless minutiae that can change the essence or the entire character of a brew. I can lose hours and days reading about the steps in the process, thinking about the optimizations of the mash temperature rests to optimize alpha and beta amylase (which others have doubtless already optimized far better than I am likely to be able to do, since they have a significant monetary incentive to do so!), and re wording countless measurements and statistics for each batch. I’m definitely not retaining everything I read, hear, or talk about yet, and I’ll probably never achieve a perfect retention, but I certainly find it interesting.

Along with that, there seems to come a natural tendency among most of the homebrewers with whom I am acquainted towards process optimization and efficiency and consistency improvements – which naturally lead to fabrication. This is a hobby which it is incredibly easy to spend an enormous amount of money very easily; on more than one occasion I have found myself contemplating the purchase of a TIG welder in order to “repurpose” old restaurant fixtures into brewing sculptures of innumerate purposes. It’s an ongoing effort of the will to remind myself that I can accomplish a perfectly adequate extract or partial mash with just the 22 quart pressure cooker I use as a kettle and the Darkstar burner I got with my starter kit from Midwest Supplies. Though I will need to get a funnel at some point to support easier transfer into a carboy if my plastic pail primary is full, and a large sieve would prove helpful if I end up doing a partial mash oatmeal stout again, and if I’m ordering those things I should go ahead and get the parts to make a dip tube for my bottling bucket, and… well, it keeps going along those lines.  And that doesn’t even take into consideration the desire to have a kit on hand if I have the time and motivation to brew!

Taking into consideration the equipment I already possess, improvements in my processes that could be achieved with small purchases, a promising opportunity to be able to keg my batches with minimal upfront expense through an offer to borrow/barter, and charges for shipping, I have come to the realization that it’s time to establish a plan, or at least an outline, so I’m better prepared and more focused in the face of inevitable future purchases.  Otherwise it’s simply too easy to look at the daily deals on homebrewfinds.com and find myself building a cart that I ultimately won’t purchase because I have no realistic plan or goal established for the purchases.

My goal with this post is fourfold:  To establish a list of purchases I can foresee making, and a potentially dynamic order for making those purchases based on a combination of need, funds availability, and maximal value; to centralize a list of products I have seen that provide potential improvements in efficiency, quality, or experience, and what purpose or return would be achieved through the purchase (potentially in comparison to similar products and establishing a reference for the superiority of a selection to a similar product); to establish a price history for use in determination of optimal valuation; and to facilitate the reduction of value loss to shipping charges by consolidating multiple items when feasible.

I checked out a few table and spreadsheet plugins that would facilitate this, but none seemed to be the fit I was looking for (all of them left me thinking about simple tie-ins to Google Docs or much more complex builds using Xataface).  Instead I think what I’ll do is just maintain a list here, perhaps tied into a spreadsheet at some point in the future, with links to pages that house the details.

To Purchase

  1. Funnel
  2. Brew kettles
  3. Beer line and picnic valve
  4. 10 gallon water cooler mash tun with ball valve and false bottom
  5. Sensory training kit
  6. Test tubes for yeast slants

Already Acquired

  1. Bottling Bucket Dip Tube – made in December 2013, a VERY worthwhile upgrade!
  2. Kegerator/Chest Freezer – purchased on best price match December 2013
Be the first to comment

The gravity of beer…

Posted October 26, 2013 By Landis V
Having a "little" beer.

Having a “little” beer… but not the one under measurement.

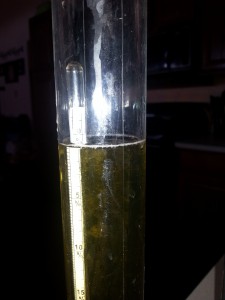
I borrowed a hydrometer and tested the gravity of the beer I’ve had bubbling away in a carboy in my basement since early May.  Yes, it has actually been running that long.  I’ve heard from a few folks that the wort (donated by a local brewery) was on the rich side.  Seems we’re getting close to finishing up now, not a lot of bubbling but still a few now and then.

The measurements were taken on 10/26/13 with the wort (is it still technically wort after five months and nearing the end of the process?) around 65°.  Unfortunately I don’t have an original gravity reading right now, but I hope to get one from someone else who worked with wort of the same lineage after next Saturday.

Watching the beer develop has piqued my interest enough that I’ve placed some orders with Midwest Supplies and Northern Brewers.  You can read up on the gravity calculations and how the alcohol content of the final product here if you are interested.  I’m still very much a novice, but the process is interesting enough I might actually take the time to see if I can understand all the influences involved – air and liquid temperature, densities of the initial and finished product, and several others I probably wouldn’t have thought about initially.

We sampled the uncarbonated beer after the measurements, and the flavor is unique but not bad.  There’s enough jalapeno in it that you get the flavor without the burn.  Somehow it comes across to me as having a salty taste.  Looking forward to bottling it in the near future and eventually seeing how it comes out once it has some carbonation.

Gravity reading from 10/26/13 near the end of fermentation on my first batch of beer.  Wort around 65°, better picture than the previous one.

Gravity reading from 10/26/13 near the end of fermentation on my first batch of beer. “Wort” around 65°.

Potential alcohol reading on the hydrometer, 10/26/13.  There's not a whole lot of "potential" left.

Potential alcohol reading on the hydrometer, 10/26/13. There’s not a whole lot of “potential” left.

Be the first to comment

Create a juju charm for Xataface under LXC

Posted September 20, 2013 By landisv1

Xataface is one of those tools I can easily see myself doing a lot of work with, and not all personal.  I can see a lot of benefit to setting up a process so I can spin up a new container that’s ready to go with a MySQL database, Apache, and Xataface.  Revisiting this page I have linked to previously got me thinking about this, and a little more research lead to this page at Ubuntu with instructions to create a juju charm.  Unfortunately I can’t dedicate the time to it at the moment.

Be the first to comment

Android Phone as an IP Camera

Posted January 19, 2013 By Landis V

My wife mentioned a listing on one of the Facebook exchange groups that have become popular lately, and it got me thinking about a topic I’ve considered before, but in a new way.

A similar model of Levana monitor from Amazon.

The listing was for a Levana Era baby monitor (similar to the one pictured at left), which does appear to be well received and fairly feature rich, and which we will probably end up purchasing as well, because my projects always tend to exist in a state of perpetual beta! As I was reading about the features and functionality of the Levana product, I had the same thought I always have when looking at cameras – it would be great if this was an IP device I could simply view from my Android.  This inevitably led to searching for established hacks on the Levana, and as typically happens, determining that it would probably be cheaper to just purchase a regular IP camera for use on the network (which we will also probably do at some point in the future), searching the Android market for apps related to video monitoring, running across the IP Webcam app, and the recollection that we have a Samsung Acclaim laying around with a broken screen, just waiting to be given a purpose and to have new life breathed into it. After locating the phone, the first step was to “root” it.  This step is probably not essential for the basic webcam functionality and can be skipped if you don’t require the remote access, firewalling, or logging I plan to implement in subsequent steps.  For the Acclaim, I used the intercept-root application available at http://intercept-root.googlecode.com/files/interceptRoot.apk.  If you enable installation from unknown sources (Settings -> Applications -> Unknown sources), you can download directly to your phone using the browser and install in two clicks once the download is complete.  The exploit took after running twice, and I had a rooted device. Part of the reason I hadn’t yet repurposed this device was the presence of SMS/MMS messages that we wanted to save.  A little searching led me to SMS Backup + in the market, which turned out to be an amazingly slick little app that I set up to back up my own SMS, MMS, and call records as well.  I did encounter one error while running the backup on the Acclaim, but simply hitting the Stop button in the application caused it to clear and continue with the backup process. Once message backup was complete, I performed a factory reset on the phone to remove all unneeded applications and data.  The phone rebooted with factory default configuration, and I set it in airplane mode and configured my wireless network settings.  I reinstalled the root application (optional, and not absolutely necessary as the phone retains root through the reset).  Because I use two factor authentication with my Google account, I needed to set up a single-use password under my Google account just for this phone.  The Market application automatically updated to the Play Store, and I installed Titanium Backup to allow the removal of a few items I didn’t really need.  At this point I noticed that my e-mail and contacts had sync’ed to the phone, which I didn’t really want or need, so I went ahead and disabled automatic synchronization.  In hindsight I should have set up the account and disabled synchronization right away, but I’m not significantly concerned about it for the time being; I have considered removing the GMail application from the device, but I’m not yet sure if I will end up needing it for any type of alerting/notification from the camera. Since the phone was up on my wifi connection at this time, I also added a static DHCP reservation for it on my wireless router.  This procedure varies by router model, but is generally fairly well documented with a little searching.  I wanted to have an SSH server installed on the phone so I have a way to access it without having to physically hold it in my hand, as well as to provide an option for tunneling video from the camera across a secure connection.  This is also overkill in most environments, but is an option if you choose to do so.  I ended up using SSHDroid as an SSH server after initially wasting several hours trying to get DropBear to start.  Interestingly enough there were some additional benefits to SSHDroid that I wasn’t expecting (like bash command completion and automatic color directory listings), so it was definitely worthwhile.  Just wish I had done it sooner.

I’ve had this post sitting as a draft for a while, and I think in the interest of perhaps having it be helpful to someone I’ll go ahead and get it posted.  Not a lot of meat to it, mostly just notes my setup steps.  The IPCam application definitely does as it says, though I have to admit that I haven’t played around with the camera as much as I originally thought I might.  But I can definitely see setting it up on my normal phone and my wife’s, perhaps in conjunction with making an infrared LED flashlight, and using it to keep an eye on the girls in the camper if we want to sit outside while they are sleeping.

Be the first to comment

UEFI booting/installing (Fedora?)

Posted June 2, 2012 By Landis V

Trying to get a new system booting Linux. I’ve run into a few issues, and I believe the mainboard is UEFI and that’s where my headaches are coming from (Foxconn A7DA-S). In the process of trying to get a UEFI partition built on the hard disk. Ran across this, but will be rebooting to test and don’t want to lose it.
https://wiki.archlinux.org/index.php/Unified_Extensible_Firmware_Interface#Create_an_UEFI_System_Partition_in_Linux

Be the first to comment